Lots of people think Roblox’s 1024× texture resolution limit is a problem.
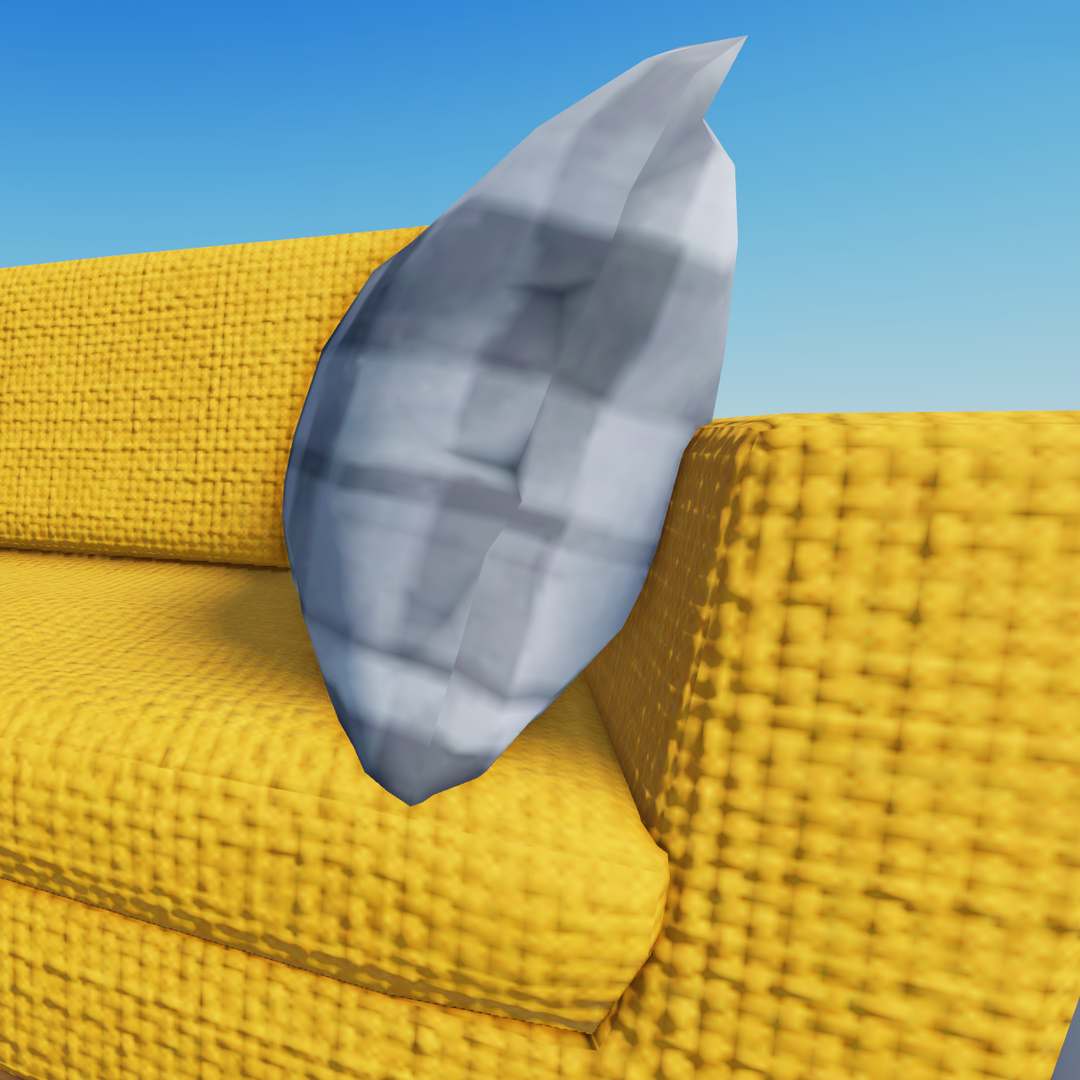
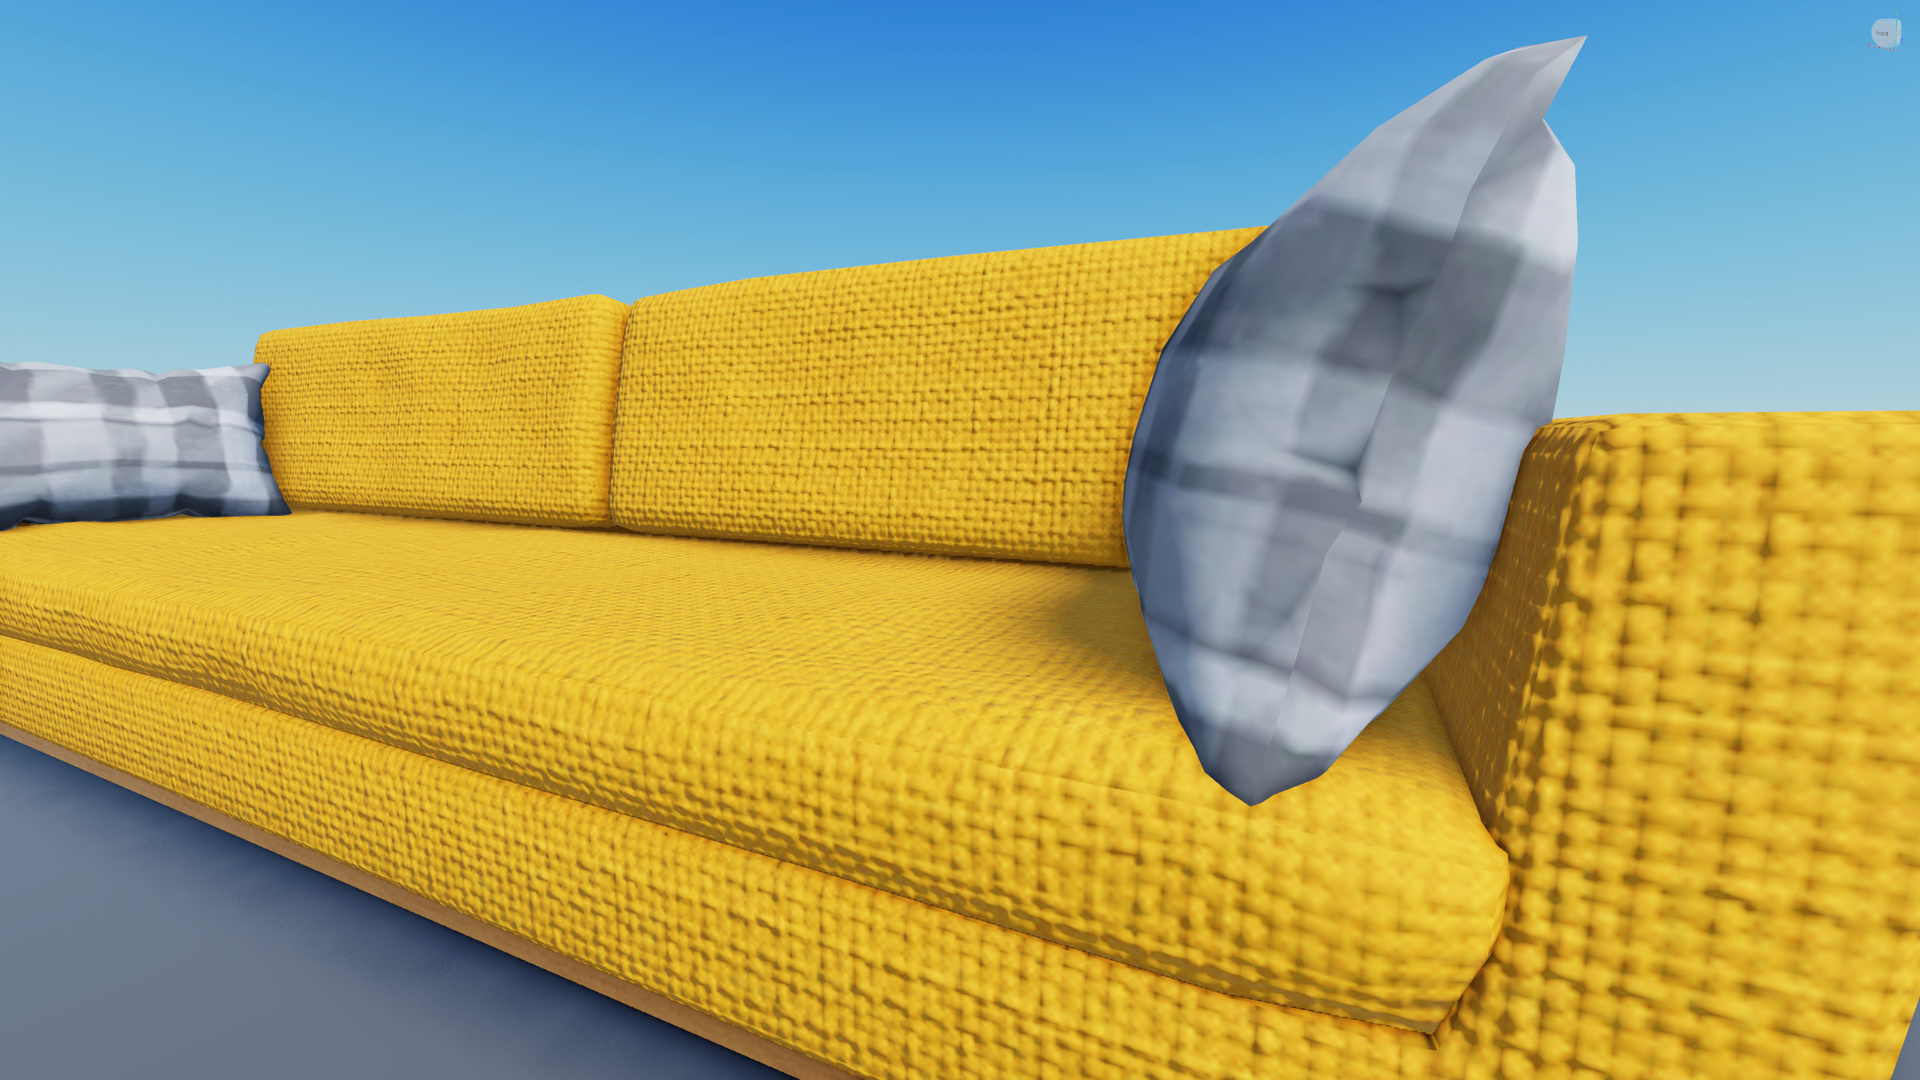
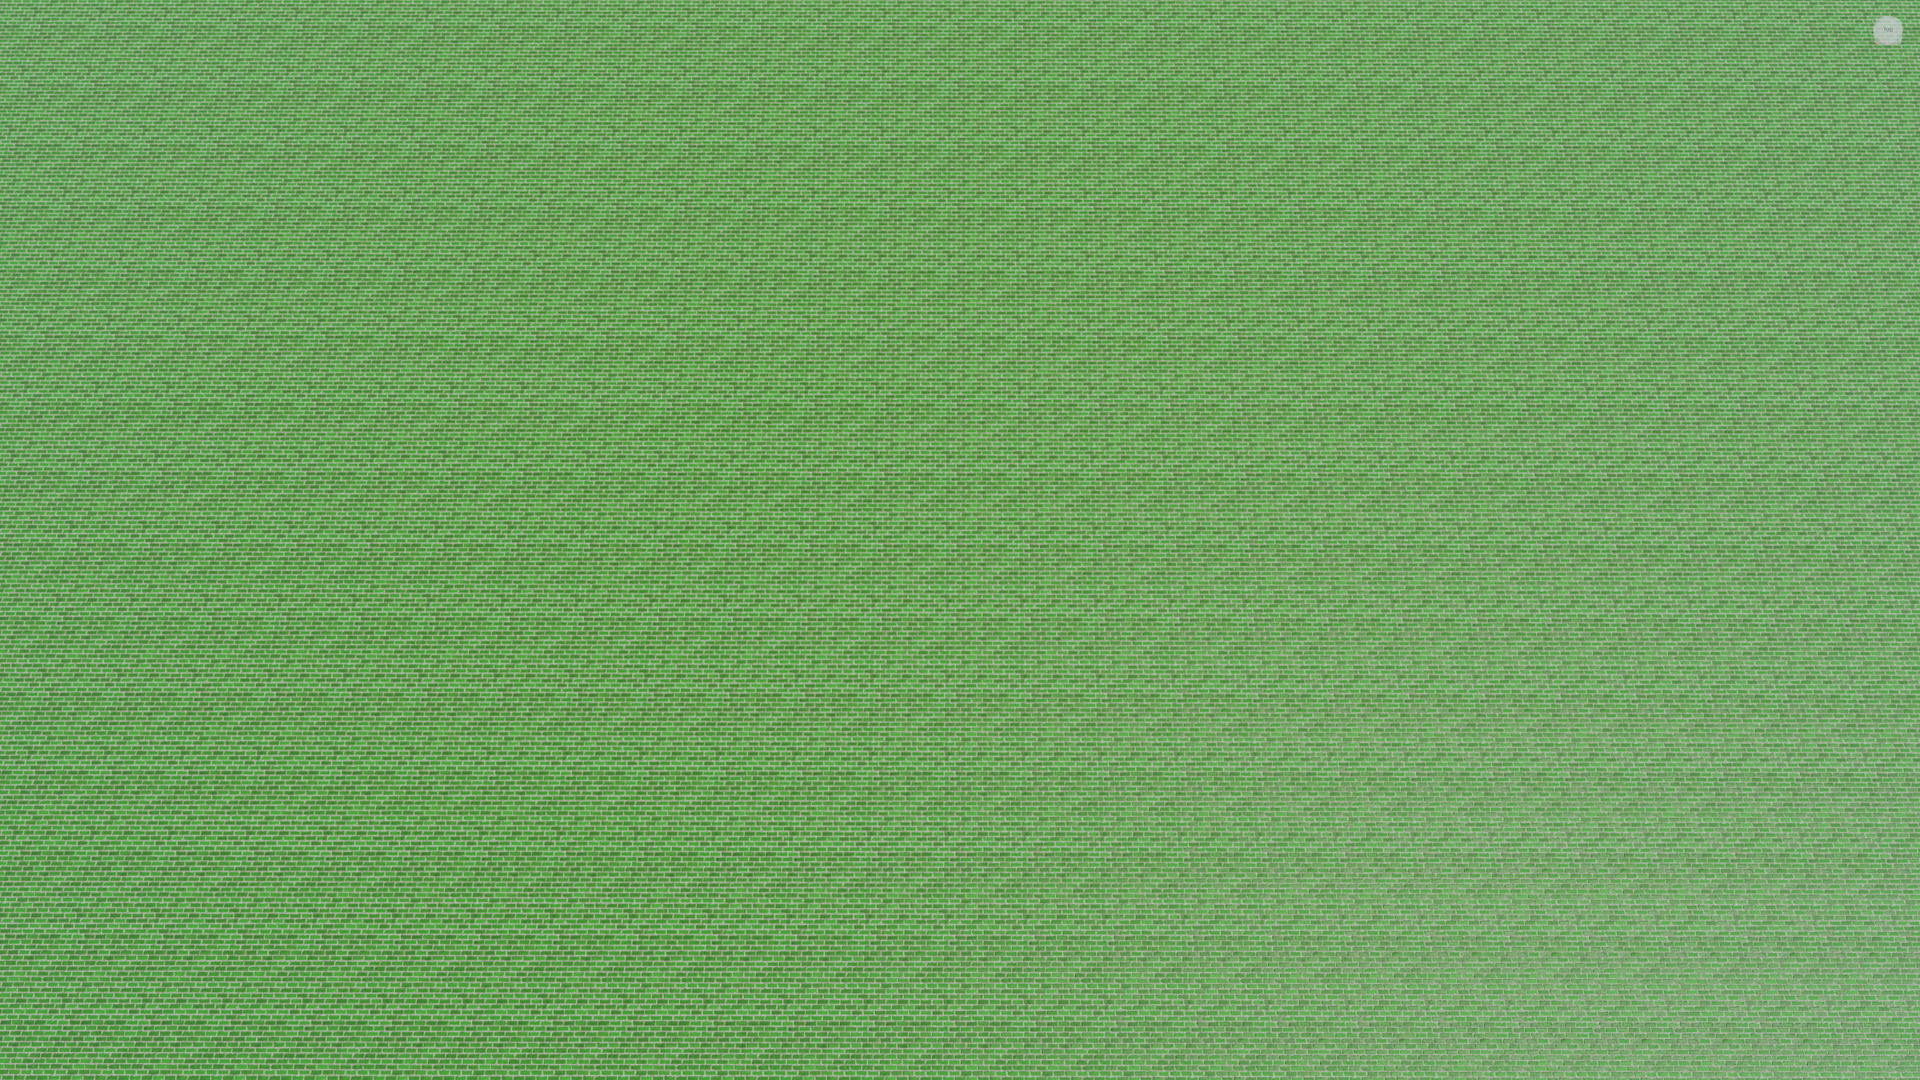
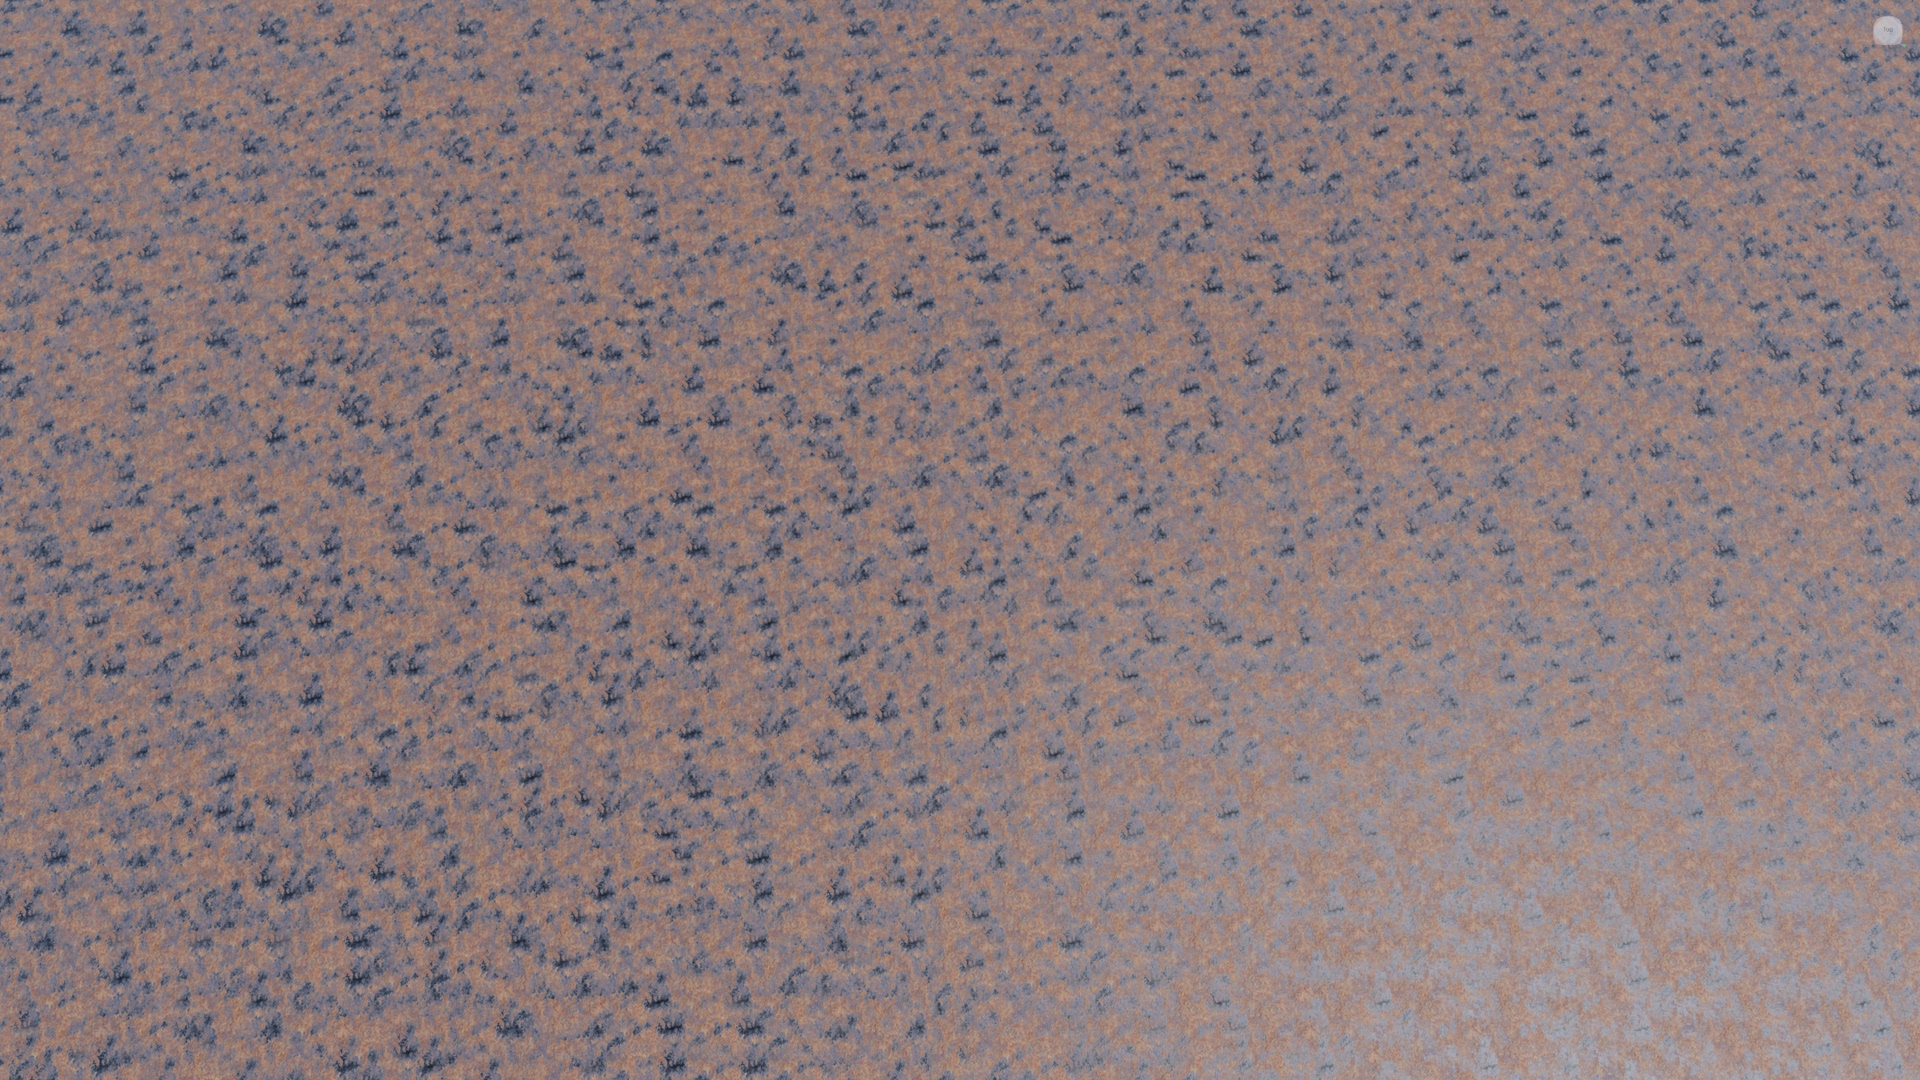
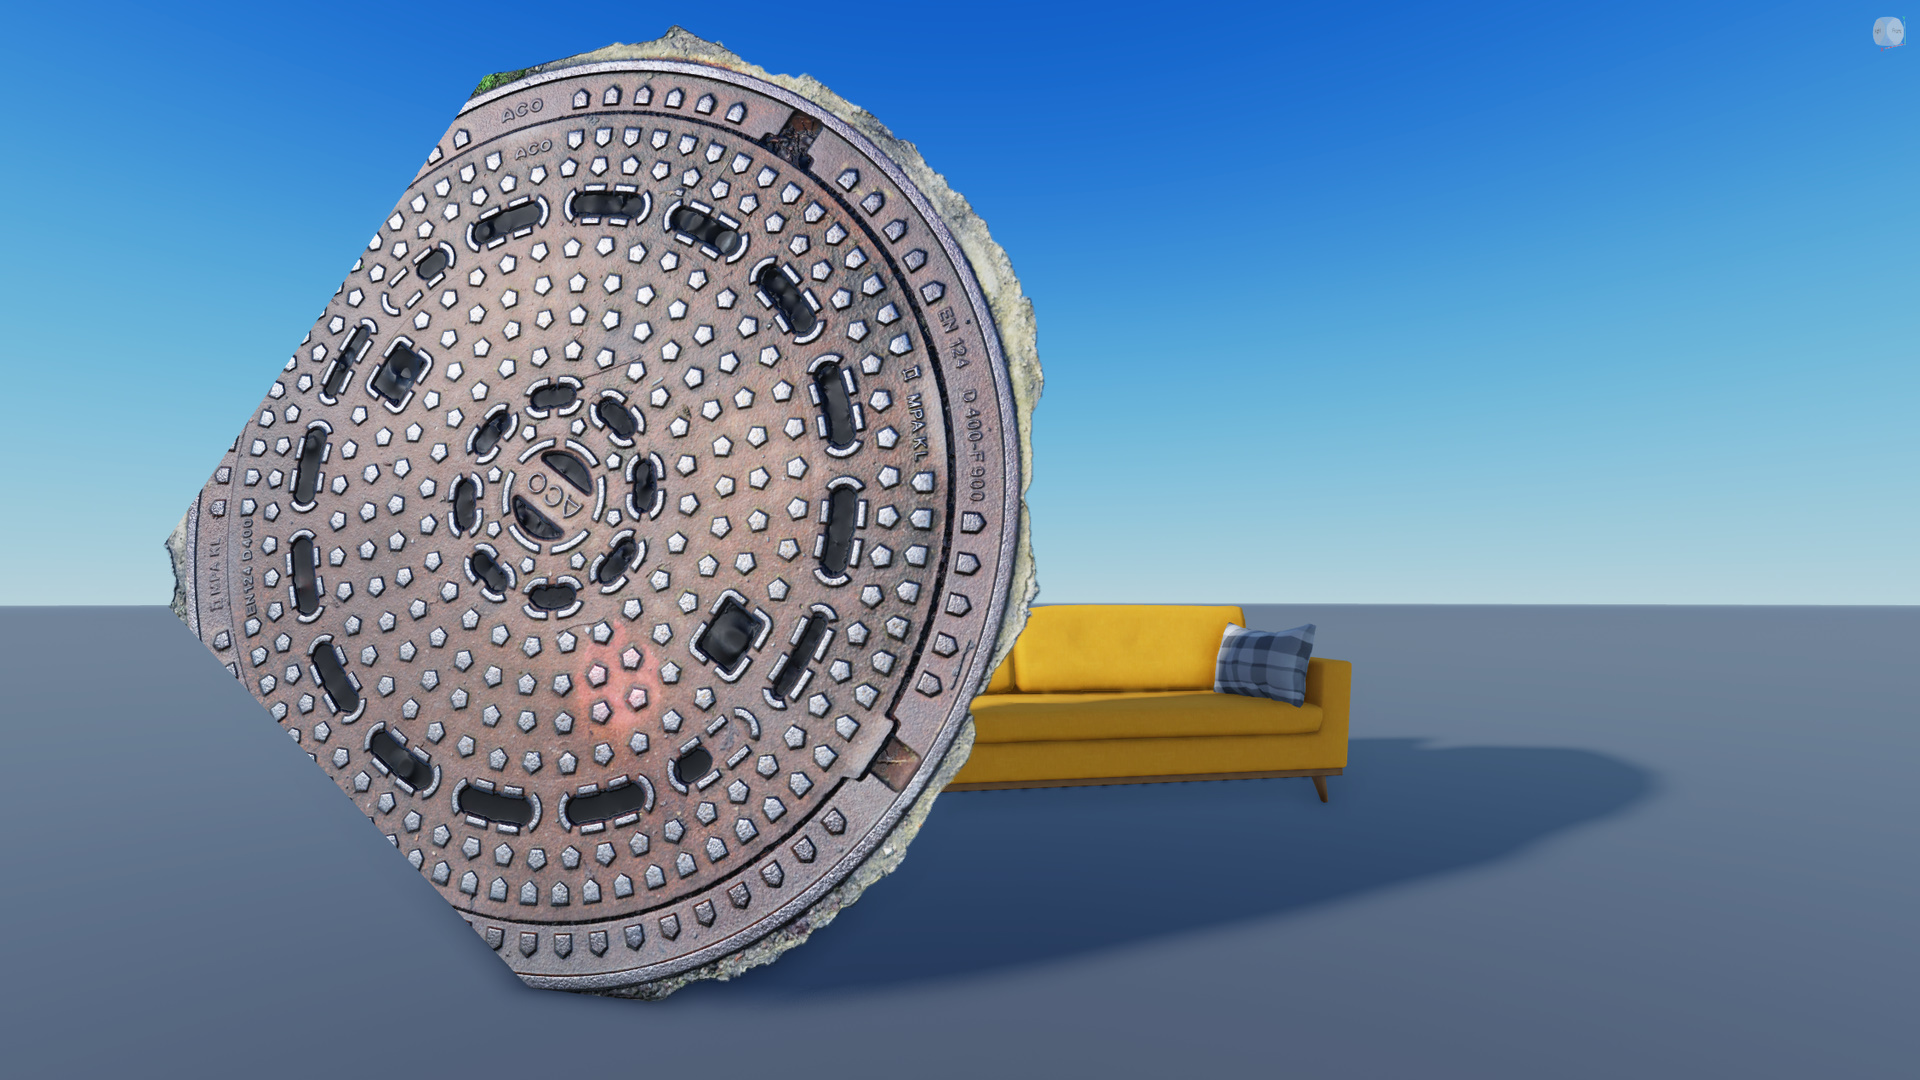
I mean, come on, look at this sofa. I’m using 1024×1024 textures here, and it looks gross.
It’s high time for Roblox to add 4K texture support to the engine. You could
fall back to lower resolutions for like, phones and stuff. Look at these local
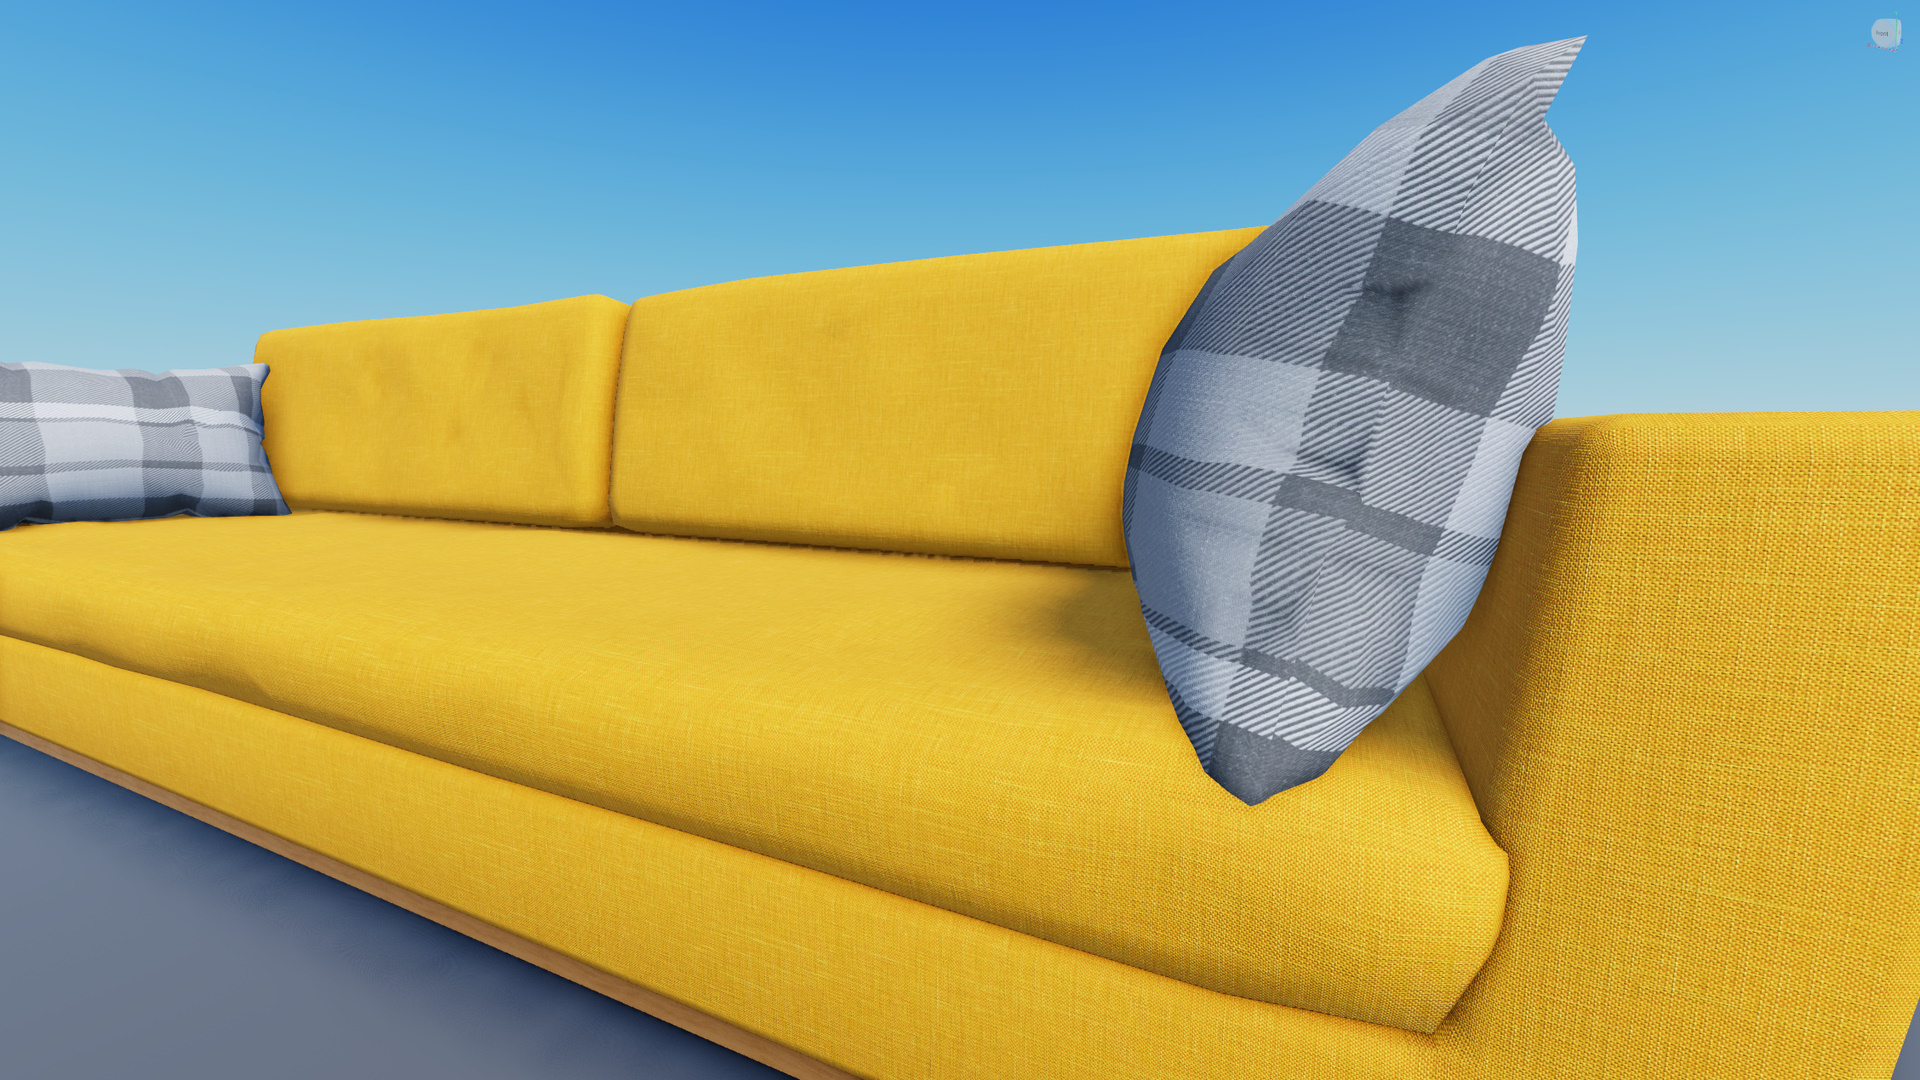
4K textures I put in my /content folder - isn’t it glorious? The threads of
the fabric, the detail in the cushion! I could lick this sofa. Except maybe
don’t do that because it’s probably hairy and gross and stuff.
So Roblox should just add 4K textures, right?
Oops! It’s all texels
I lied to you. Both pictures have 1024×1024 textures. I did all of this within Roblox’s limits today. If your models look like picture 1 and not picture 2, then pay attention.
You’re not deficient in resolution. You’re deficient in texel density.
Texels are the pixels of your texture, loosely speaking. The thing that makes picture 1 unattractive is that the texels appear very large on the model, which makes everything look blocky, blurry and undefined. Picture 2’s texels appear very small relative to the model, so there’s plenty of texels for showing the finest of details such as threads of fabric.
I will use texel density to refer to the ‘bigness’ of the texels. If your texels are large and far apart, you have a low texel density. If your texels are small and close together, you have a high texel density. Higher texel density means you can ‘zoom in’ on your texture more without losing detail.
So, how do we increase our texel density and exploit those juicy pixels?
Yeet your UVs
Some people think of the UV square as a little cell which your UVs sit in. You arrange your UVs nicely within the box, get everything nice and snug with the edges, and forget about it soon after. Perhaps you’re not that meticulous and you just accept whatever comes out the automatic UV unwrapper.
But those edges are actually full of magic. Beyond the boundaries of your texture, you actually find more texture! Specifically, it’s a repeat of the texture from within the bounds.
I can move up all of my UVs to where the texture would be, just above the bounds, and get exactly the same cube texturing as before.
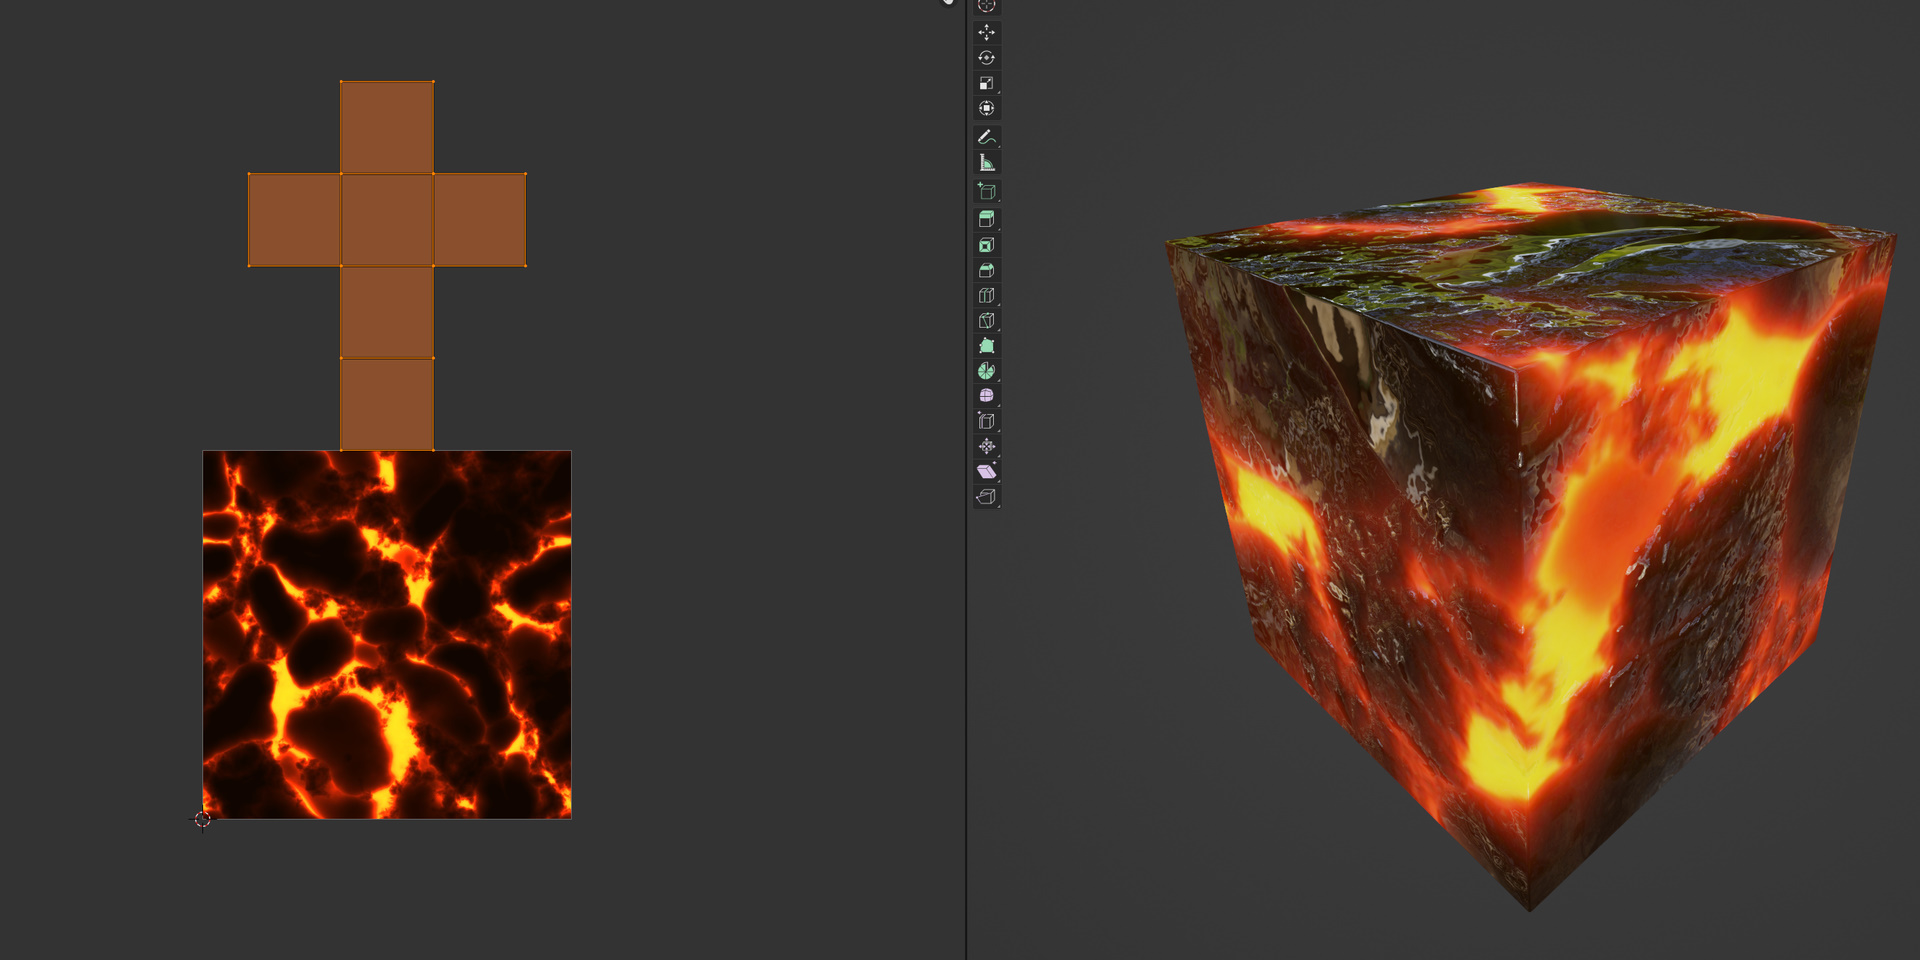
You can exploit this to make your textures tile. Just make your UV unwrap larger than the bounds of the texture, and you’ll see it starts repeating on your model. You can think of the bounds as defining the size of one texture ‘patch’. The patch is repeated to fill up your model.
This typically works best on tiling PBR maps (because you need it to tile, duh). However, here’s an idea for free resolution even if you need multiple separate UV islands in your texture.
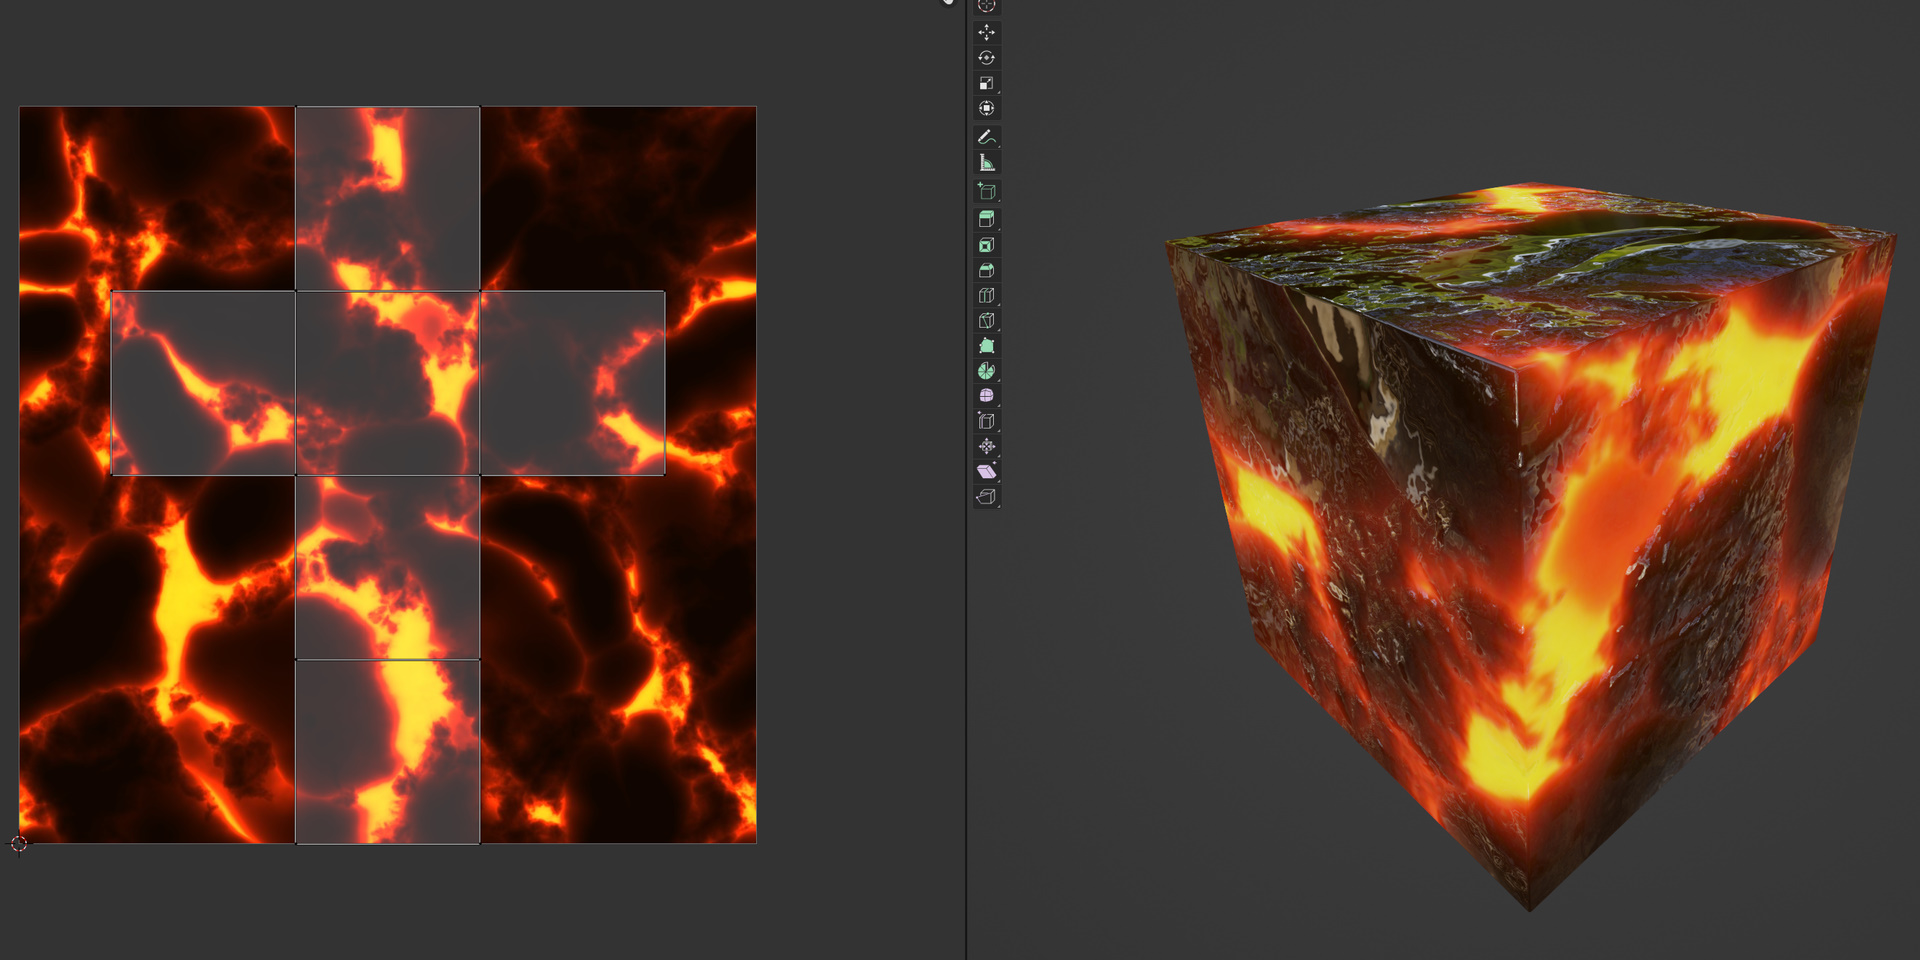
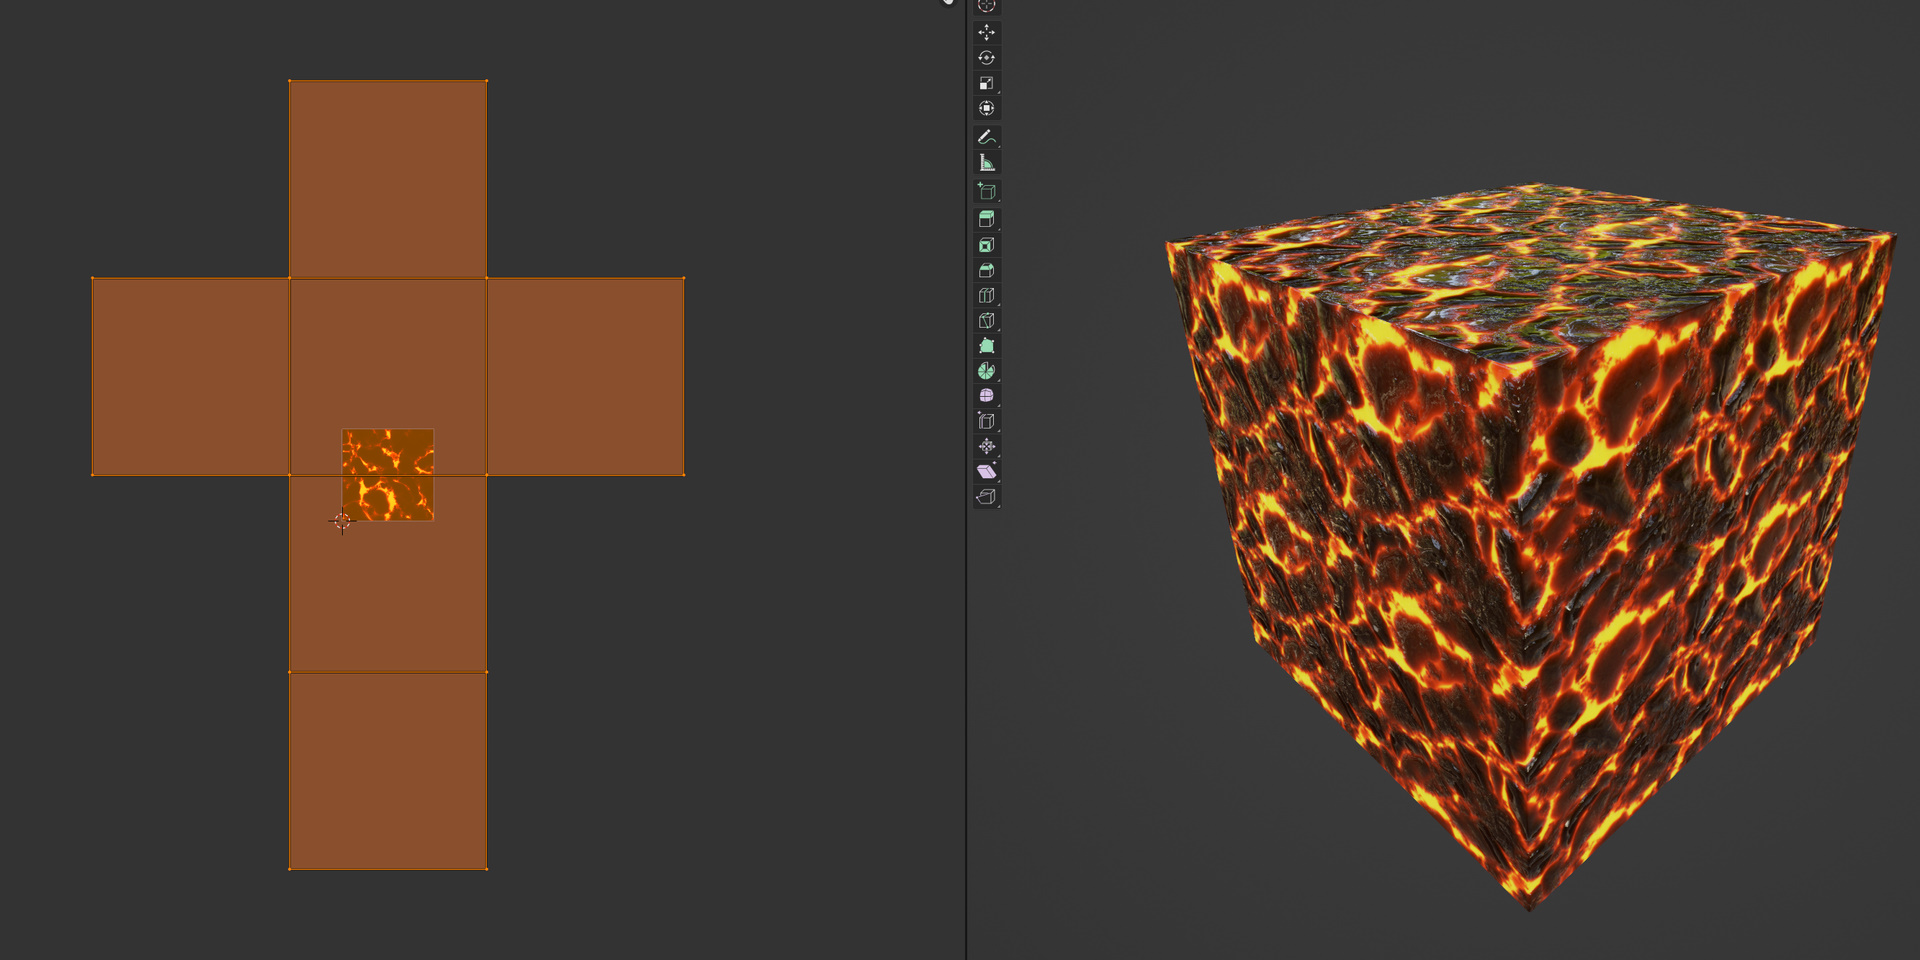
Ever considered placing your UV islands across the boundary?

This cube’s UVs have been scaled up by 1.42×, but by cleverly rotating them and using the tiling behaviour strategically, we can still map every face to a unique part of the texture without separating the faces from each other. That is to say, I have made absolutely zero changes to the actual layout of my UVs here but I just got free detail.
Would I recommend doing this? Probably not, but who knows, maybe it’ll save your ass one day in some hyper specific niche situation.
I think I’ve seen this before…
You might associate what I’m doing here with Roblox’s default material system, and you’d be right. We basically reinvented materials except we have actual control over the positioning and rotation of the textures.
I retextured my baseplate with Roblox’s default brick material. Can you see the repeating texture?
That’s because Roblox have one ‘brick’ patch that they paste over the entire part. One of the biggest challenges in authoring materials is figuring out what makes a good patch; it needs to tile seamlessly, and it shouldn’t have any obvious landmarks that you can easily see repeat, because that’d make them too distracting.
If you get fancy with shaders, you can help mitigate that by randomly pasting the patch instead. Roblox does this for any material using ‘organic’ tiling:
It goes without saying that, whenever you can get away with it, organic tiling is absolutely the best thing ever, and you should be using it as much as possible. It won’t work if your texture has prominent lines or grooves though, for example paving stones.
Excuse me sir, you need to pay for those texels
Increasing your texel density by tiling isn’t free though. Likely, a good chunk of you readers already know the tradeoff.
When you tile a texture over and over like this to get more fine-grained details (by increasing your texel density), you’re sacrificing the ability to have larger-scale variations. Think of it like choosing what scale range needs the most detail; fabric textures will need smaller texels to capture their details, while a paving stone mosaic might prefer to allocate enough texels to capture the whole mosaic, even if it’s at the expense of the tiny bumps on each stone. You choose one scale range to represent, and that’s all you get.
For the sofa at the beginning of the article, I decided to keep the fine-grained details of the individual threads intact, because they were important for defining the form of the material. However, in doing so, I lost control over the overall texture of the sofa. All of the sofa must now look like it’s made specifically of those threads; if I needed a wine stain to appear on it, I can’t uniquely assign the wine stain to some texels for the middle of the sofa, because the texels are being reused everywhere.
So, shit, right? The wine stain exists in a different scale range to the threads, so either you get your wine stain or you get your fabric threads. No wine for you.
Except…
Blending the rules
Heard of AlphaMode? It’s pretty great. It lets you see through your PBR
materials when you set it to Transparency.
The important thing this allows you to do is layer your materials. Instead of
having to commit to one set of UVs and one material, you can extrude out a
second layer just above your base material, assign it different UVs, and use a
second material on it. The alpha channel of the material’s ColorMap allows you
to control how much of the base material shows through.
Of course, you’re still subject to the same tiling limitations as before. You only get to choose one scale range for your material layer, but importantly, it no longer has to be the same range you chose for your base material. This alone should be enough to add, for example, a detail layer for reintroducing fine bumps, or having a rust effect over a metal with much finer scratches and detail.
The only cost you pay is in triangle count; you’re going to be rendering two layers, and one of them will have transparency. Beyond that, you don’t really have any other downsides; it’s a second serving of texels on the house!
If you get really creative, you can make more general-purpose ‘decals’ to apply
to any wall or surface that looks too uniform. Think dirt lines, cracks, a few
visible bricks, that sort of thing. The sky is the limit - just slap a PBR
texture on a plane, set the AlphaMode appropriately, and you’re off.
We’re not at texel nirvana yet
This is all well and good, and no doubt you’ll find techniques in this blog post that could help you improve some of your detail work, but Roblox could be doing more for us here too.
The big one is blending tiled textures. Right now, the alpha channel of your
SurfaceAppearance’s colour map is inseparably tied to your UVs. This means
it’s impossible to tile a material at high texel density, but blend it with
other materials at low texel density - something you’d normally want because
blending is far more gradual than material details. This could be solved if you
could define multiple sets of UVs and assign them differently - something
Blender already supports, if you were wondering.
Of course, the real solution here is not AlphaMode at all. What we really need
from Roblox in this area is the ability to blend between MaterialVariants
and/or SurfaceAppearances, preferably with a generous helping of Roblox’s
delicious texture-based blending they already employ for terrain materials. I
already have ideas for how such a system would work technically, from asset
delivery to the user-facing API, but that’s outside of scope here.
Over on the DevForum, I requested the feature to be added back in 2022,
but I haven’t heard anything back.
But what about texture streaming?
The most popular counterpoint to ‘4K is too expensive’ is ‘we can just choose lower quality textures for lower power devices’. This is also read; ‘only the most powerful devices will have good detail, and everyone else will continue to have terrible picture quality’.
More importantly, if we decide to solve all of our texel density problems with resolution, then it’s not entirely out of the question that we’re going to be throwing high resolution textures on a lot of things. I can already see the 4K material packs that will be floating around the Roblox Marketplace. Those are going to be performance landmines.
But we can scale down the textures if there’s a billion of them!
I hope you have some kind of priority system in place, or your entire level is going to look like it’s had a dip in Vaseline. And I don’t mean the ‘textures far away will be low-res’ variety of priority system. I mean real priority, as in ‘these key items are explicitly more important, but the textures of these set dressing props around the room are less important’.
Even if you did, we’re now faced with an equally unsatisfying problem; we can’t have detail everywhere, so we’re still going to have to manage texel density anyway. We would have done all of that work for… what, exactly? The ability for the character models to be rendered with crisp textures, and everything else to still look like shit because no phone on planet Earth can hold 50 sets of 4K PBR materials in memory?
You’re just going to end up with people tediously trying to balance texture priorities, and wishing they could have the very same tools that I advocate for here.
I think it’s virtually a guarantee that someone at Roblox will be reading this post. If that’s you, hello friend! Here is my advice: no matter what technique you end up choosing to implement, what Roblox needs right now is not resolution. What Roblox needs is texel density. It’s true that you can ‘trivially’ increase texel density by making everything high resolution, but the cost will be great. Time and time again, we see that carefully managed texels are better than having more of them, so give us the tools to use them smartly before you give us the tools to have more of them.
So, actually, no thanks. No 4K for me. I’m rather full up, thank you very much.